Here is an extremely basic tutorial that will help you setup the environment to customize Bootstrap 4 for your needs on Windows machine using Node.js and npm
Development Environment
Windows 10
Node.js
npm
This tutorial is created using Bootstrap 4.1.3 which can be downloaded from https://getbootstrap.com/docs/4.1/getting-started/download/.
Customization
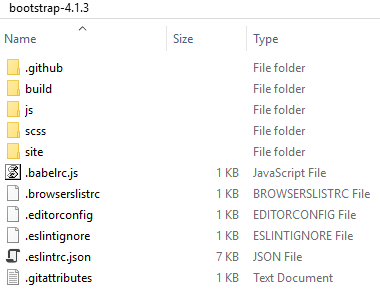
- Extract the zip file anywhere within your computer and you will have following folder structure
- Now open command prompt and navigate inside the bootstrap folder.
- Run following command to install all the npm package dependency (It may take couple of minutes)
npm install
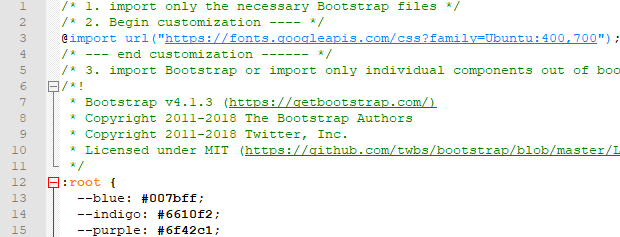
- Create bootstrap-custom.scss file within /scss/ folder and add following content in that file
- Make a change in /package.json file to use our bootstrap-custom.scss instead of bootstrap.scss to generate css file
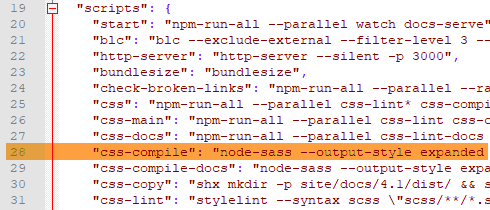

Look for a line (highlighted above) for command “css-compile” and change the portion of that command from “–precision 6 scss/bootstrap.scss dist/css/bootstrap.css” to “–precision 6 scss/bootstrap-custom.scss dist/css/bootstrap.css” - Now open command prompt and navigate inside the bootstrap folder and run following command to generate css file
npm run dist
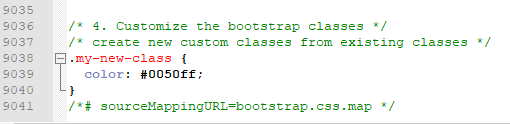
- Once the command is complete, open /dist/css/bootstrap.css file and you will see the color changed for “blue”, header and body fonts are changed to “Lora” and “Open Sans” and a new class “my-new-class” is added at the bottom of the file.


Leave a Reply